Posted on

Installing tape-in hair extensions

installing-hair-extensions-with-Walker-beautify-Tape-image

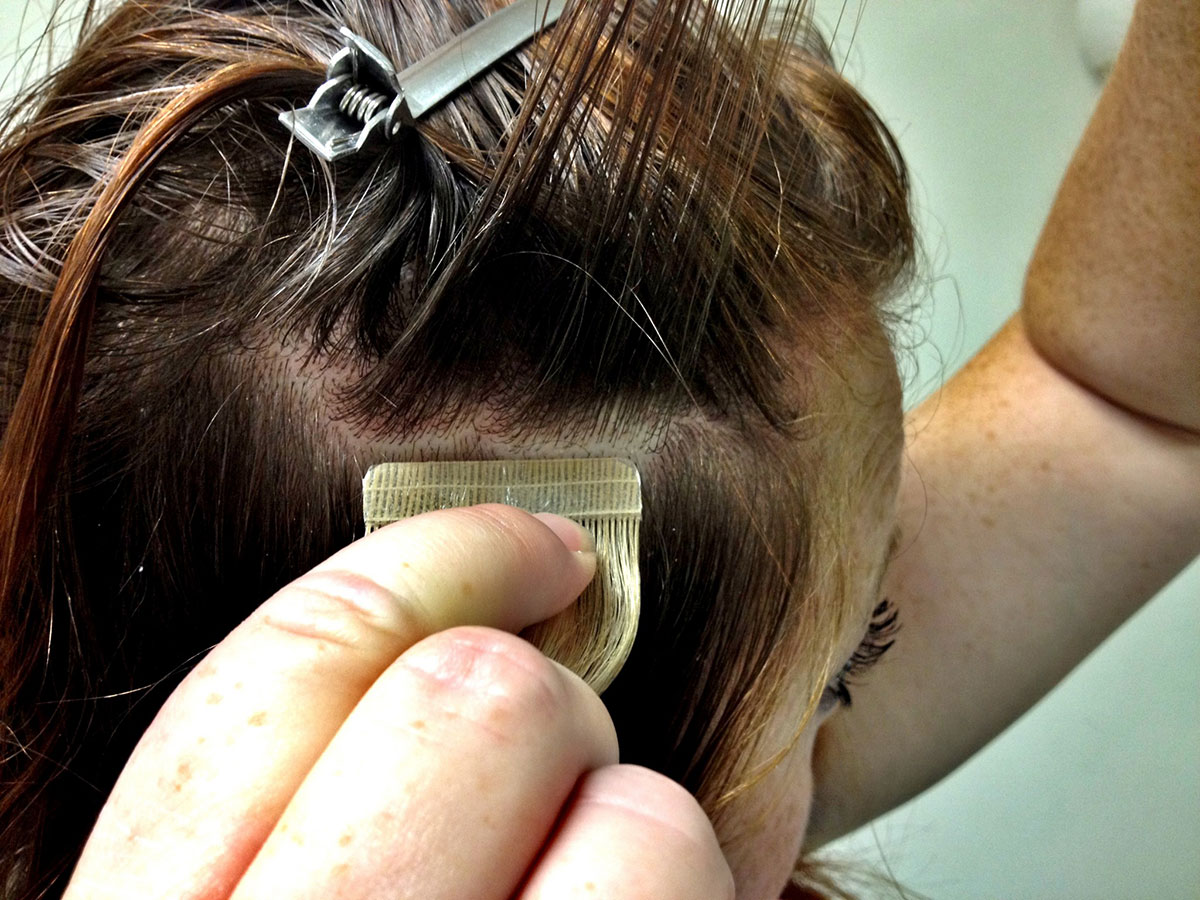
Ever wondered exactly how Tape in Extensions are installed? I know people may say,  “Oh, it’s so easy you just sandwich them together!!”  Well, what does that mean?

Not everyone is a hair extensions specialist. Walker have put this compilation of pictures together for everyone who may be wondering how to install tape-in hair extensions using their Beautify Hair Extension tape tabs. These are shown in a detailed step by step process below, which applies to Beautify Hair Extension tape range.

If you still have questions Walker have a full install video that is very helpful.

How to install tape-in hair extensions

Beautify Hair Extension tape tabs application detailed step by step process

Make sure that you have unwashed, dirty hair!

Decide where you want your hair extension.

Make sure you have a straight part!!

Perfectly, straight line!!

Pick which colour(s) you want to put in.

Apply Walker Beautify Extension Tape Tabs to weft. Make sure you align the tape perfectly.

Do the same with your second piece of hair.

Make a part directly above your first one. Make sure you have about 1/8″ of hair.

With Walker Extension Tape Tabs on the weft, peel off the white liner.

Line the tape weft flush with your bottom straight part.

Lay down the 1/8″ of hair on top of the tape weft. Make sure you press the hair onto the tape.

Important. Remove all loose hair not stuck on the tape. If you do not, the hold will not be as good and will not stay in as long.

Align the second piece of hair perfectly with the bottom piece.

Press FIRMLY together. Pro tip – using caution, straighteners on low heat help cure tape at this stage – see video.

Cut the length off to match your own.

Now you look fabulous!!

Stay looking fabulous longer with our Hair Extensions care guide

Posted on

Looking after your Hair Extensions

Hair Extensions Guide image

One of the most important things to remember about hair extensions is that they are an investment.

If you’re not willing to spend the time or money necessary on getting and maintaining good quality extensions, you’re better off not getting them.

That said, when you or your clients get extensions installed it’s important to know the right ways to take care of them. That’s why we created our extension guide. This guide is printable so you can print it for yourself to keep wherever you get ready every day.

If you’re a stylist, you can also print it to give to your clients. As you know, clients who take care of their extensions are much easier and more fun to help than those who don’t understand how to care for them.

To download the PDF file and print or save, click here: Holistique Hair Extension Care Guide Printable

Holistique Hair Extensions Care Guide Printable image

Posted on

How To Install Tape In Hair Extensions

hair extension tape how to apply

HowToInstallExtensions

How To Install Tape In Hair Extensions

 If you want easy, mess free, and durable extensions without emptying your wallet, tape in hair extensions might be for you!

Applying tape in hair extensions is easy to do at home or by a stylist! Which is great when you want to try your hand at adding your own beautiful extensions.

The application process is done by placing two pieces of Pro-Flex II or No-Shine Tape Tabs onto each other with your own hair in between. This technique is called the “sandwich” technique.

 If you are unsure about doing this process at home, we HIGHLY recommend you go to a professional stylist who has been trained to do tape in hair extensions.


Step 1

Starting from the bottom, section your hair and make sure that you have a nice clean horizontal line in your hair.


Step 2

Place your first tape extension 1 cm from your hair roots and press down firmly.


Step 3

After you have firmly pressed the tape extension into your hair, lift the hairs that did not attach to the tape and clip them up with the rest of your hair.

After you clip the hairs that did not stick to the tape,  you will then place the second tape extension on top of the first tape firmly. Make sure the tapes are even.


Step 4

Once you have firmly place the two tapes together, take a small (or regular size) flat iron and place it onto the tape for one second. This way the glue with be sure to stick to the hairs in between the two tapes in the sandwich.


Step 5

And there you go!


Now, repeat steps 1 through 4 placing the tape extensions side by side with a distance of 1 cm.


After your first row, go up 1 inch and start your second row and work upwards.


While you are installing extensions, be sure to double check to see that you are not placing the extensions out on the sides. This will make them visible. Your extensions should always be covered underneath your hair.


If you would like to see a video on how to install tape in hair extensions with Hair Extension Tape’s Pro-Flex II Tape Tabs click here.


Before Pro-Flex II Tape Tabs

After Pro-Flex II Tape Tabs