Ever wondered exactly how Tape in Extensions are installed? I know people may say, “Oh, it’s so easy you just sandwich them together!!” Well, what does that mean?
Not everyone is a hair extensions specialist. Walker have put this compilation of pictures together for everyone who may be wondering how to install tape-in hair extensions using their Beautify Hair Extension tape tabs. These are shown in a detailed step by step process below, which applies to Beautify Hair Extension tape range.
If you still have questions Walker have a full install video that is very helpful.
How to install tape-in hair extensions
Beautify Hair Extension tape tabs application detailed step by step process

Make sure that you have unwashed, dirty hair!

Decide where you want your hair extension.

Make sure you have a straight part!!

Perfectly, straight line!!

Pick which colour(s) you want to put in.

Apply Walker Beautify Extension Tape Tabs to weft. Make sure you align the tape perfectly.

Do the same with your second piece of hair.

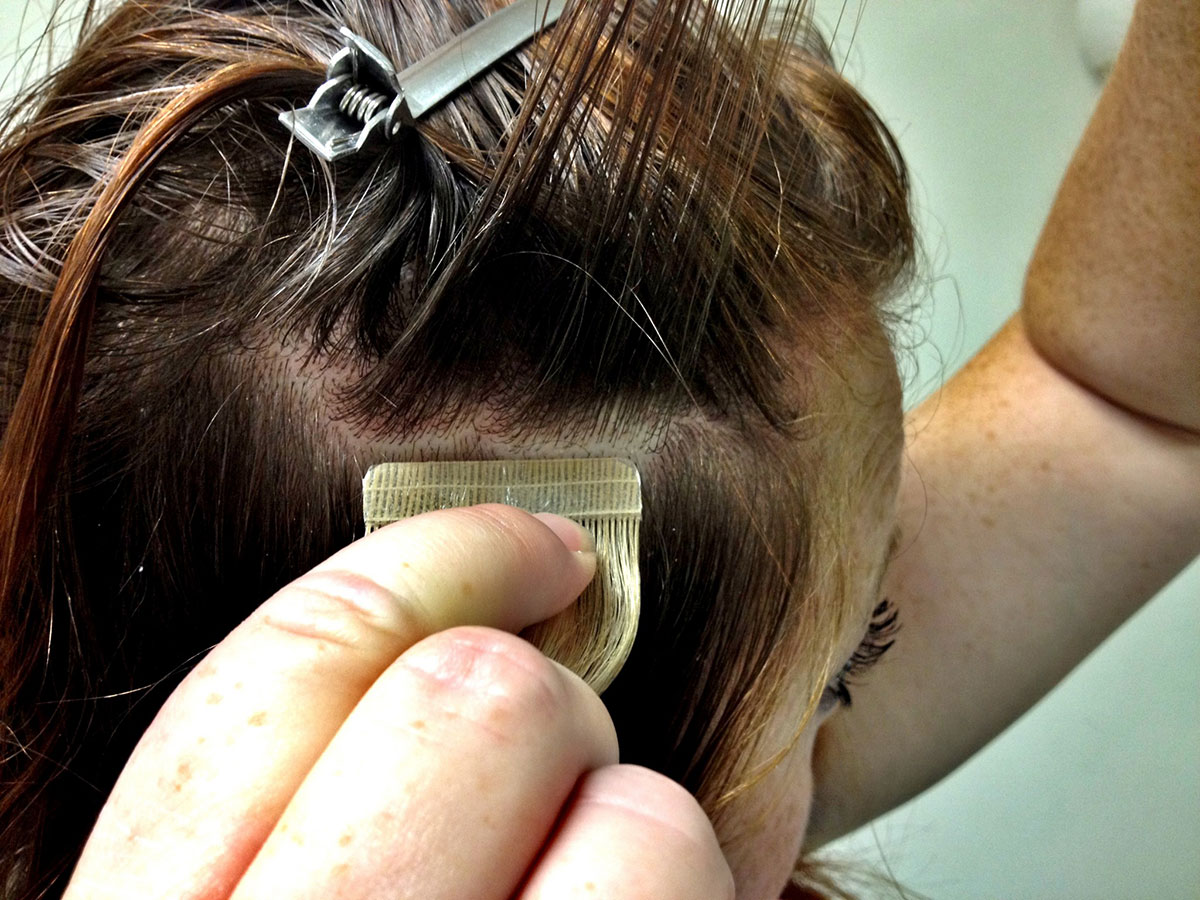
Make a part directly above your first one. Make sure you have about 1/8″ of hair.

With Walker Extension Tape Tabs on the weft, peel off the white liner.

Line the tape weft flush with your bottom straight part.

Lay down the 1/8″ of hair on top of the tape weft. Make sure you press the hair onto the tape.

Important. Remove all loose hair not stuck on the tape. If you do not, the hold will not be as good and will not stay in as long.

Align the second piece of hair perfectly with the bottom piece.

Press FIRMLY together. Pro tip – using caution, straighteners on low heat help cure tape at this stage – see video.

Cut the length off to match your own.

Now you look fabulous!!
Stay looking fabulous longer with our Hair Extensions care guide